
Indoor relative humidity between 30 and 50 percent, leaks repaired within 24 to 48 hours, and post-shower exhaust ventilation form the core of any effective household mold prevention plan. Colonization needs three things at once: sustained moisture, an organic food source, and warm temperatures. Remove any one of those, and spores never germinate.
What follows covers humidity targets, room-by-room habits, and seasonal routines that keep mold from getting a foothold before stains or odors ever appear.
Why Mold Takes Hold Indoors
Mold spores drift through every indoor environment on air currents and settle on every exposed surface. They sit dormant until moisture, warmth, and a digestible material line up at the same moment. Large reviews and field studies summarized by the CDC show colonies can establish on wet drywall, carpet padding, wood, or ceiling tile within 24 to 48 hours after water exposure, a tighter window than most homeowners assume.
The temperature range that matters most runs roughly 60 to 80°F, which describes the inside of nearly every climate-controlled home for most of the year. The food source is rarely a problem because dust, skin cells, paper, and the cellulose in drywall all qualify. That leaves moisture as the single lever you actually control, which is why the rest of this plan circles back to it.
Why the Inspection Mindset Has to Start Before the Smell
A musty odor or a visible black spot is a late signal. By the time you smell mildew in a basement or see a stain on a bathroom ceiling, colonies have usually been growing for days or weeks. Spores also lodge inside wall cavities, under flooring, and inside HVAC ducts, where they circulate through the ductwork each time the blower kicks on. Prevention means checking for moisture conditions long before any of those signs appear, using a hygrometer and a quarterly walkthrough rather than your nose.
The Health Stakes That Justify the Effort
Exposure to airborne spores can trigger allergic reactions, asthma flare-ups, and respiratory irritation, and children, older adults, and anyone with a compromised immune system face the highest risk. EPA guidance notes that sensitive individuals may react to even small concentrations, which is why prevention matters more than remediation in most homes.
Setting the Right Humidity Targets for Every Room
The EPA cites 30 to 50 percent relative humidity as the ideal indoor range, with 60 percent as a hard ceiling above which mold risk climbs sharply. Relative humidity (RH) is the percentage of moisture the air is holding compared to what it could hold at that temperature, and it is the single number your prevention system should track across seasons and rooms.
Treating the whole house with one target is the most common mistake. A finished basement in July and a heated bedroom in January sit on opposite sides of that range even when both feel “normal” to the person standing in them. Room-specific targets and seasonal adjustments are what close that gap.
Room-Specific Targets That Reflect Real Conditions
| Space | Target RH | When Risk Peaks |
|---|---|---|
| Bathroom (in use) | Below 60% | During and 30 minutes after showers |
| Kitchen (cooking) | Below 60% | Steam-heavy meals, boiling water, dishwasher cycles |
| Basement | 30 to 50% | Late spring through early fall in humid climates |
| Bedrooms | 30 to 50% | Cool months with cold exterior walls |
| Crawl space | Below 50% | Year-round, especially summer |
Choosing and Placing a Hygrometer
A basic digital hygrometer costs under $15 and gives you the feedback loop the rest of the system depends on. Place one in the basement, one in the main living area, and one in the bathroom. Keep them away from direct sunlight, heating vents, and exterior walls, since those microclimates skew the reading. Analog dial hygrometers work but usually drift within a year and require periodic recalibration using a salt-test chamber.
Seasonal Shifts Worth Tracking
Winter brings a different problem than summer. Cold exterior walls, single-pane glass, and uninsulated window frames condense warm indoor air into liquid water on contact. Summer pushes outdoor humidity through basement walls and foundation cracks. Run a humidity check in March, July, and November, and adjust your dehumidifier or ventilation routine based on what the readings show.
The Room-By-Room Prevention Checklist
Walk the house once a quarter and run this list. It takes about 30 minutes and catches the conditions that turn a dry home into a mold problem before colonies ever take hold.
Bathrooms
Bathrooms concentrate more moisture per square foot than any other room, so a tight routine pays off fast.
- Run the fan early: Switch on the exhaust fan before the shower starts and leave it on for 20 to 30 minutes after you finish.
- Confirm outside venting: Verify the duct actually discharges through a wall or soffit rather than into the attic, where trapped moisture feeds hidden growth.
- Dry the mat: Squeeze excess water from bath mats and hang them fully spread between uses so they do not stay damp for hours.
- Wipe tile weekly: Clean grout lines and shower corners once a week, because soap film and standing droplets are all mold needs to start.
- Re-caulk twice a year: Inspect the caulk line at the tub spout and base every six months and replace any cracks that let water behind the wall.
Kitchens
A 100 to 150 CFM range hood handles most home kitchens, and anything above 400 CFM is overkill unless you cook professionally.
- Use the hood on high: Run it every time you cook, especially when boiling water or steaming vegetables.
- Cover pots: Lids keep steam contained at the source instead of letting it billow into the room.
- Wipe condensation: Dry window glass and exterior walls after each cook session to prevent hidden moisture from settling into paint.
- Check the fridge: Empty the drip pan under the refrigerator and inspect the ice-maker line for slow leaks twice a year.
Basements and Crawl Spaces
Roughly half of all hidden household mold problems originate below grade, which makes deliberate prevention work in these areas essential.
- Seal foundation cracks: Patch visible cracks with hydraulic cement or polyurethane caulk before the spring rainy season.
- Test the sump pump: Pour a bucket of water into the pit each spring and confirm the pump activates and discharges outside.
- Lay a vapor barrier: Cover bare crawl-space floors with 6-mil polyethylene and overlap seams by at least 12 inches.
- Size the dehumidifier: A 30-pint model covers about 1,500 square feet of mild dampness, while a 50-pint unit handles 2,000+ square feet of moderate to heavy moisture.
- Choose continuous drain: Pick a unit with a built-in humidistat and a continuous-drain option so it can run unattended for days.
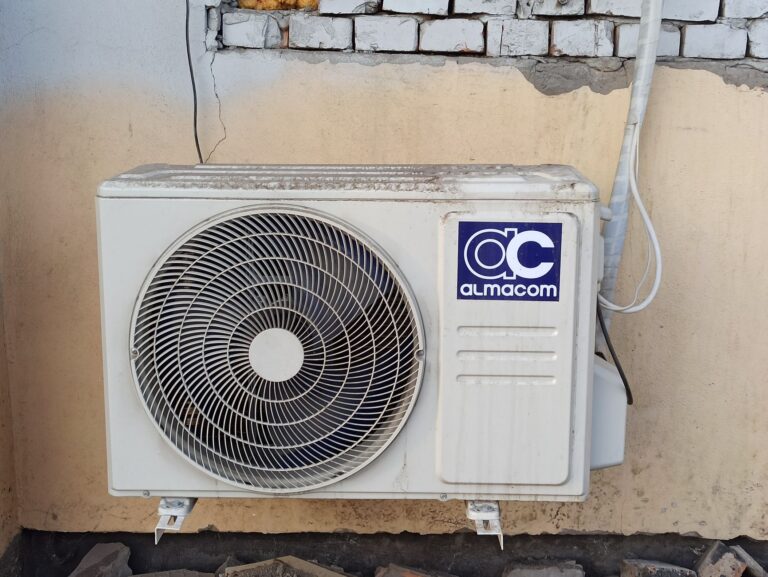
Watch the AC condensate drain line. A clogged line backs water up into the drip pan, which spills over inside the air handler and seeds mold growth throughout the ductwork. Flush the line with a cup of distilled vinegar every spring.
Bedrooms and Living Areas
Keep furniture an inch or two off exterior walls so air can circulate behind dressers and headboards. Open closet doors periodically and run a small fan if they feel stuffy. Check window glass for condensation every morning during cold months. A pattern of fog or beads forming on the inside pane means indoor humidity is too high for those surfaces, and a dehumidifier or ventilation upgrade is overdue.
Tools Worth Buying and Tools to Skip
The prevention aisle is full of products that promise more than they deliver. Here is an honest read on what actually moves the needle and what just makes a dent in your wallet.
Dehumidifiers: Match the Size to the Job
| Dampness Level | Room Size | Capacity to Choose |
|---|---|---|
| Mild (occasional dampness) | Up to 500 sq ft | 20 to 30 pints/day |
| Moderate (visible dampness, musty odor) | 500 to 1,500 sq ft | 30 to 50 pints/day |
| Severe (standing water, persistent smell) | 1,500+ sq ft | 50+ pints/day with pump and continuous drain |
Pints-per-day ratings follow the AHAM standard at 80°F and 60% RH, so a real-world basement at 65°F and 70% RH may extract less than the label claims. Look for ENERGY STAR certification to keep operating costs down, since dehumidifiers in damp basements can run 12 hours a day.
Smart Leak Sensors and Automatic Shutoff Valves
A $30 water-leak sensor under the dishwasher, washing machine, and water heater catches a slow failure before it soaks the subfloor. An automatic shutoff valve on the main water line costs $200 to $400 installed and pays for itself the first time a supply hose bursts while you are away. Both feed phone alerts so you can act within minutes instead of days.
Mold-Resistant Paints and Building Materials
Products containing EPA-registered mildewcides, such as Concrobium Mold Control or Mold Armor paint additive, genuinely inhibit surface growth on dry substrates. Kilz Mold & Mildew primer and Zinsser Mold Killing Primer work as sealers over previously stained drywall. Standard interior paint with “mold-resistant” on the label but no listed antimicrobial offers little more than marketing copy.
Air Purifiers With HEPA Filtration
A True HEPA filter captures airborne spores down to 0.3 microns and reduces the concentration circulating through your living space. It does nothing for the colonies already growing on wet surfaces. Treat an air purifier as a complement to moisture control, not a substitute for it.
The First 72 Hours After a Leak or Flood
The window between water contact and colonization is the only leverage you have. Move fast and you keep the damage to drying. Move slow and you are negotiating with a remediation contractor.
The First 24 Hours
Stop the water source at the shutoff valve. Photograph and video every affected surface for the insurance claim. Remove standing water with a wet vac or pump. Pull baseboards and drill small weep holes at the bottom of drywall to let trapped water drain. Set up fans and a dehumidifier aimed at the wet area, and aim to drop indoor humidity below 50% across the whole affected zone.
The 24 to 48 Hour Window
Porous materials hit by clean water can sometimes be dried in place if air movers run continuously and humidity stays low. Carpet padding, MDF baseboards, and cellulose insulation almost always need to come out because they hold water like a sponge and feed mold from inside the wall cavity. Cut drywall 12 inches above the highest visible waterline to expose the framing for drying.
The 48 to 72 Hour Decision Point
Bring in a licensed industrial hygienist or restoration contractor before the 48-hour mark. Both the EPA and CDC recommend professional assessment when water has sat longer than 48 hours or covered more than 10 square feet, because colonies can establish in hidden cavities you cannot see or smell. Treat the cost of a $300 to $500 inspection as insurance against a $5,000 to $30,000 remediation job.
A Quick Risk Scorecard for Any Moisture Event
- Duration: Under 24 hours usually dries in place; over 48 hours usually means removal.
- Area affected: Over 10 square feet triggers professional guidance per CDC guidance.
- Materials involved: Porous (drywall, carpet, insulation) versus non-porous (tile, concrete, metal).
- Water category: Clean supply line versus grey water versus black water from a sewer backup.
- Hidden cavities: Wall cavities, subfloors, and HVAC ductwork that absorbed water without visible signs.
A Seasonal Routine That Catches Problems Early
Mold prevention is a recurring habit, not a one-time project. A four-season rhythm keeps small moisture events from compounding into colonization.
Spring: Outside-In Inspection
Walk the roofline with binoculars and look for lifted, missing, or curled shingles. Clean gutters and confirm downspouts discharge at least four feet from the foundation. Check the grading around the house: soil should slope away from the foundation at six inches over the first ten feet. Spring rains find every weakness in that envelope, and the cost of a $20 tube of caulk now is far less than the cost of foundation repair later.
Summer: Humidity Load Test
Basements and crawl spaces face their toughest stretch when outdoor humidity peaks. Run a hygrometer check every two weeks. Service the AC condensate line and confirm the drip pan under the air handler drains freely. Run the dehumidifier continuously and empty the reservoir or verify the drain line is clear. If the unit cannot hold RH below 55%, the coils may be freezing up or the refrigerant may be low.
Fall: Seal the Cold-Air Leaks
Cold air reaching warm, moist interior surfaces is the setup for winter condensation. Caulk around window frames, seal gaps where pipes penetrate exterior walls, and add weatherstripping to attic hatches. Insulate cold-water pipes in exterior walls to keep them above the dew point. These small fixes cut wintertime window condensation and the mold risk that comes with it.
Winter: Daily Window Check
Condensation on window glass is the cheapest humidity gauge you own. A quick morning scan tells you whether bathroom fans are running long enough, whether the kitchen hood is venting properly, and whether the dehumidifier is keeping up. In very cold climates, run bath and kitchen fans during and well after use, and consider a whole-house HRV (heat recovery ventilator) if moisture keeps building despite localized ventilation. Schedule a mid-season humidity check in January to confirm the whole-house reading still sits in the 30 to 50% window.
The Bottom Line
Mold prevention is moisture control wearing a different name. The room-by-room habits, the seasonal inspections, and the right-sized dehumidifier all serve one goal: keep indoor relative humidity in the 30 to 50% range and respond to water events within the 24 to 48 hour window before colonization begins. Once that system runs on autopilot, musty odors and visible spots stop being things you fight and start being things you prevent.
FAQ
What humidity level prevents mold growth in a home?
Most homes stay mold-free when indoor relative humidity sits between 30 and 50 percent, and risk climbs sharply once readings push past the 60 percent ceiling. The EPA cites this range as the baseline, though basements and bathrooms may need tighter control during showers, cooking, or summer humidity spikes.
How can I stop mold from growing in my bathroom?
Run the exhaust fan during every shower and for 20 to 30 minutes after, confirm the vent discharges outside rather than into the attic, squeegee tile walls after each use, and re-caulk any cracked grout or tub seal twice a year. Keeping relative humidity below 60 percent during and after showers removes the moisture window mold needs.
Do dehumidifiers help prevent mold?
A properly sized dehumidifier running below 50 percent relative humidity keeps dry surfaces free of colonizing mold colonies. Choose 30 to 50 pints per day for typical basements and pair it with a built-in humidistat and continuous drain so it runs unattended.
What causes mold to grow in basements and crawl spaces?
Outdoor humidity pushes moisture through foundation walls and cracks, while warm indoor air condenses on cool concrete and rim joists. A missing or torn vapor barrier, a failed sump pump, or a clogged AC condensate line can each raise crawl-space humidity above 60 percent within days.
How do I prevent mold after a water leak or flood?
Stop the water at the shutoff valve, extract standing water within hours, set up fans and a dehumidifier immediately, and cut out soaked carpet padding, MDF baseboards, and wet drywall within 24 to 48 hours. Document everything for your insurance claim before cleanup begins.
Is mold prevention different in winter versus summer?
Yes. Winter mainly produces interior condensation on cold exterior walls and single-pane glass, so the work is sealing air leaks and running fans longer after showers. Summer drives high absolute humidity into basements and crawl spaces, so the work shifts to running a dehumidifier, servicing the AC condensate line, and verifying drainage at the foundation.