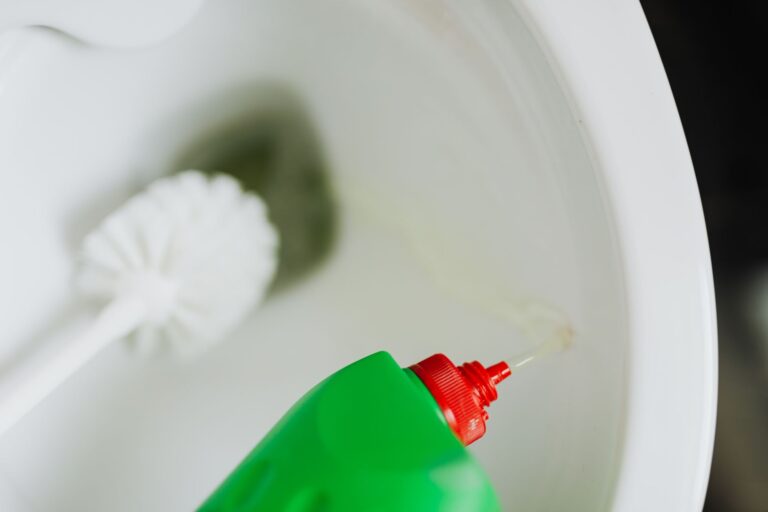

A brief bleach rinse may clean porcelain, but constant chlorine exposure can damage tank parts. You can add diluted plain household chlorine bleach for a rare, drained-tank wash, then rinse it away. Leaving bleach, tablets, or pool chlorine in tank water exposes rubber and valve parts during every flush.
Your bathroom fixture needs a different response for slime, mineral scale, rust, and recurring leaks. The steps below cover tank care, bowl stains, septic-system concerns, and repair signals.
Bleach Has a Narrow Role in Tank Cleaning
A toilet tank can hold gray sediment, dark film, or musty odor while the bowl still looks clean. A brief wash with diluted household chlorine bleach can address tank slime or mildew after the tank is drained. Your rinse water should carry the bleach away before the fixture returns to normal operation.
The key difference is contact time. A one-time wash limits chlorine contact with the rubber flapper, fill valve, flush valve seal, and gaskets. Bleach left in standing water reaches those same parts through dozens of flush cycles.
Choose plain, unscented household chlorine bleach for this narrow task. Skip splashless bleach, gel bleach, scented formulas, and products blended with added cleaning ingredients.
Clorox and Lysol sell several bleach-based products, but the label matters more than the brand. Your toilet tank does not need fragrance, thickeners, dyes, or extra surfactants. Added ingredients can leave residue on moving parts and make rinsing harder.
For routine grime, mild soap and water are a better starting point. Save diluted bleach for visible mildew, dark slime, or odor that remains after loose sediment comes out. That choice keeps chlorine away from your toilet hardware except during a short, controlled task.
Continuous Chlorine Exposure Wears Toilet Parts
Rubber parts show the earliest damage from chlorine left in tank water. Chlorine can dry a rubber flapper, stiffen gaskets, and weaken the flexible diaphragm inside a fill valve. You may hear the result as a short refill hiss every 10 to 30 minutes.
Rubber seals lose flexibility
A flapper must sit flat against the flush valve seat to hold water in the tank. Once its edge curls, cracks, or feels stiff, water slips into the bowl. Your toilet then refills even though nobody touched the handle.
Part makers warn against in-tank chemical cleaners because constant exposure shortens component life. Fluidmaster, Kohler, and American Standard direct attention toward bowl cleaning rather than ongoing tank additives in product-care materials. Their guidance fits the mechanical problem: a seal cannot hold water once rubber loses flexibility.
Metal hardware and plastic can also deteriorate
Older tanks deserve extra attention because bolts, washers, and valve assemblies may already have worn surfaces. Chlorine can speed corrosion on metal hardware and make aged plastic brittle. A rusty bolt head, chalky plastic clip, or cracked float arm needs inspection before it fails.
| Part | Chlorine-related wear | What you may notice |
|---|---|---|
| Rubber flapper | Drying, curling, cracking | Tank refills without a flush |
| Rubber seals and gaskets | Loss of flexibility | Slow leaks near fittings |
| Fill-valve diaphragm | Weak response or sticking | Incomplete refill or noisy flow |
| Tank bolts | Corrosion around washers | Water near the tank base |
| Flush valve seal | Warping or surface cracks | Thin stream entering the bowl |
Bleach tablets, drop-in cleaners, and pool chlorine tablets do not belong in tank water unless the toilet maker permits them in writing. Pool chlorine tablets contain concentrated chlorine intended for large outdoor water systems. Your plumbing fixture is not a pool chlorinator.
A Controlled Tank-Cleaning Routine Limits Exposure
Draining the tank keeps cleaning liquid away from the water that moves through your fixture all day. Gather gloves, eye protection, a nonabrasive sponge or soft brush, a bucket, and fresh water for rinsing. Open a window or run the bathroom exhaust fan before starting.
Drain the tank and check surfaces
- Shut off water: Turn the supply valve clockwise, then flush to lower the water level inside your tank.
- Protect hands and eyes: Put on gloves and eye protection before reaching near the fill valve, float, or overflow tube.
- Lift loose sediment: Remove grit with a sponge or soft brush without scraping porcelain or pulling on the overflow tube.
- Check prior residue: Confirm that no toilet bowl cleaner, white vinegar, descaler, or unknown product remains on tank surfaces.
- Mix diluted bleach: Add a modest amount of household chlorine bleach to water instead of pouring concentrated bleach onto parts.
- Keep contact brief: Scrub reachable porcelain surfaces with light pressure, then move directly to rinsing.
- Rinse several times: Refill and flush until the bleach odor is gone and tank water looks clear.
Your hands and eyes need protection because splashes can rise near the fill valve and float. Set the porcelain lid on a folded towel rather than the slick tub edge. A chipped lid can leave a sharp edge, and replacement lids are not always easy to match.
Restore water and inspect the refill cycle
Turn the supply valve back on and watch one full refill. Water should stop below the top of the overflow tube. A fill line that reaches the tube can send water into it and resemble a leak.
Finish by checking the flapper, flush valve, tank bolts, supply connection, and floor around the base. You should hear silence after water reaches the fill line. Continued trickling, dripping, or weak flushing points to worn hardware rather than surface dirt.
How to clean a toilet tank safely comes down to separation and rinsing. Keep bleach away from other products, limit its contact with internal parts, and check for leaks before replacing the lid. Your last step matters because a small flapper leak can waste water for days without a visible puddle.
Once the mechanism is confirmed sound, the remaining marks can be matched to what caused them.
Each Stain Needs Its Own Cleaning Method
Dark film and stale odor call for a different response than white crust or orange streaks. Bleach has little effect on hard-water mineral deposits because mineral buildup is not organic grime. Your choice should match the mark instead of turning the tank into a chlorine reservoir.
Stain sources point toward different materials
| Problem | Better approach | Where it belongs |
|---|---|---|
| Slimy film or mildew | Brief diluted bleach wash followed by thorough rinsing | Drained tank surfaces |
| Routine tank grime | Mild soap or toilet-maker-permitted cleaner | Tank walls and lid underside |
| Hard-water scale | Descaling product made for mineral deposits | Porcelain after bleach residue is gone |
| Orange rust stains | Rust remover labeled for porcelain | Toilet bowl, not the tank |
| Brown bowl ring | Toilet bowl cleaner matched to the stain | Below the rim and waterline |
| Stubborn mineral deposits | Porcelain-safe descaler with separate rinse steps | Porcelain toilet bowl |
White vinegar can loosen light calcium stains, but it must never meet bleach residue. Rinse until no chlorine smell remains before bringing vinegar or an acidic descaler near the same porcelain. Separate cleaning sessions keep products from reacting in the bowl or tank.
A badly stained porcelain toilet bowl needs direct attention below the rim and waterline. Choose a toilet bowl cleaner suited to rust, scale, or organic marks, then follow its label directions. Your internal tank mechanisms stay safer because bowl products do not sit around the flapper.
How to remove toilet tank stains depends on where the stain formed. Slimy residue on drained tank walls points toward a brief bleach wash, while white scale points toward mineral-heavy water. Orange staining inside the bowl can also signal iron in the water supply.
Choosing by stain also prevents incompatible products from meeting in the bowl or tank.
Chemical Separation Protects You and Your Plumbing
Residue alone can create a hazard. Bleach mixed with ammonia, white vinegar, acidic toilet bowl cleaner, descaler, rust remover, or an unknown liquid can release dangerous gases. You should work with one product at a time, rinse it away, and refill with fresh water before changing methods.
Never pour a new product into water holding an unidentified cleaner. Drain, rinse, and refill instead, even though the earlier product appears gone.
Shortcuts create avoidable problems
- Drop-in tablets: They expose rubber components to chlorine between every flush and can cause a quiet leak.
- Pool tablets: Their concentrated chemistry is unsuitable for toilet hardware and can harm parts quickly.
- Mixed cleaners: Combining products in the bowl or tank can produce fumes that irritate eyes and lungs.
- Unrinsed descaler: Acid residue must leave before bleach reaches the same porcelain surface.
- Weekly chlorine dosing: Repeated chemicals place added stress on toilet parts and a septic system.
A septic system relies on bacteria to break down waste after water leaves your home. A rare, diluted, fully rinsed tank wash differs from chlorine entering every flush through tablets or standing bleach. Your septic bacteria face less disruption when bowl stains receive direct cleaning instead of constant tank dosing.
The answer is no for standard toilet hardware. A musty smell needs source checking, since sediment, mildew, poor ventilation, or a running toilet can each produce a different maintenance task.
Early clues are useful only when they lead to the right inspection or repair.
Maintenance and Repair Signs Keep Problems Small
A clean bowl does not require treated tank water. Scrub the bowl as needed, then reserve tank work for visible slime, odor, sediment, or confirmed mildew. That approach reflects plumber recommendations: mild cleaning methods belong alongside prompt repair of worn parts.
Small symptoms reveal failing components
- Random refilling: Water loss through a warped flapper can trigger the fill valve without a flush.
- Bowl trickle: A thin stream entering the bowl shows that the flush valve seal is not holding.
- Brittle rubber: A stiff or cracked flapper needs replacement rather than stronger cleaning chemicals.
- Corroded hardware: Rust around bolts or washers can lead to seepage beneath the toilet tank.
- Water at base: Moisture on the floor calls for prompt inspection of bolts, wax seal, and supply connection.
- Recurring dark film: Repeated slime can point toward water conditions, persistent moisture, or a tank that needs more frequent rinsing.
Persistent yellow or brown marks can signal mineral-heavy water, while recurring slime can point to water-quality conditions. You can remove a surface symptom, but a plumber can inspect a running toilet and a water professional can identify mineral content. That division helps separate fixture repair from a water-supply issue.
Rental records and repair requests clarify the cause
In a rental, photograph water near the base, corroded bolts, and repeated refill behavior before sending a maintenance request. Your record shows that the issue involves fixture wear rather than a missed cleaning task. Avoid dismantling a tank with badly rusted hardware.
Homeowners should also inspect the supply connection after a tank wash. A dry floor, quiet refill cycle, and stable water line show that the tank returned to normal operation. Continued water movement needs a flapper, fill valve, or flush valve inspection.
Final Tank Care
Use diluted household chlorine bleach only for a brief, isolated tank wash, then rinse until fresh water replaces it. Your toilet depends on flexible rubber and precise valve movement, both of which suffer under repeated chlorine exposure. Clean bowl stains where they appear and match the product to the stain.
No. Keep bleach limited to rare, rinsed cleaning sessions, and replace a failing flapper or fill valve before a quiet leak turns into a higher water bill.
FAQ
Can you put bleach in a toilet tank?
You can use a modest diluted amount of plain household bleach for a rare tank cleaning after draining the water and clearing other products. Rinse the tank thoroughly after brief contact. Do not leave bleach sitting in the water or use it as an ongoing flushing treatment.
Will bleach damage a toilet flapper, fill valve, or other rubber components?
Bleach can damage toilet tank parts through repeated contact. Your rubber flapper, seals, gaskets, and fill-valve diaphragm can dry out, stiffen, curl, or crack after chlorine sits in the tank. Metal bolts can corrode, and older plastic parts can become brittle.
What do plumbers recommend to clean toilet tanks?
Plumbers tend to favor draining the tank, removing sediment with a soft brush or sponge, and using mild cleaning methods suited to the visible problem. You should avoid tablets that stay in the water. A worn flapper, noisy fill valve, or recurring leak needs repair rather than stronger chemicals.
Can I put pool chlorine tablets in my toilet tank?
Pool-grade tablets release more chlorine than toilet-tank components can safely handle. Pool products contain concentrated chlorine meant for large outdoor water systems, not rubber seals, plastic valves, or porcelain plumbing fixtures. Their prolonged contact can damage internal parts and trigger leaks or erratic flushing.
What kind of bleach can you use in toilets?
Plain, unscented household chlorine bleach is the only type suited to a limited tank-cleaning task. You should skip splashless, scented, gel, color-safe, and mixed formulas because they can contain thickeners or added ingredients. Keep bleach away from vinegar, ammonia, acids, and unknown cleaning residues.
How do you clean a toilet tank without bleach?
Drain the toilet tank, remove sediment with a soft sponge or brush, and wash porcelain surfaces with mild soap and water. Your rinse water should run clear before the tank refills. White vinegar belongs only in a separate session after all bleach residue has left the fixture.