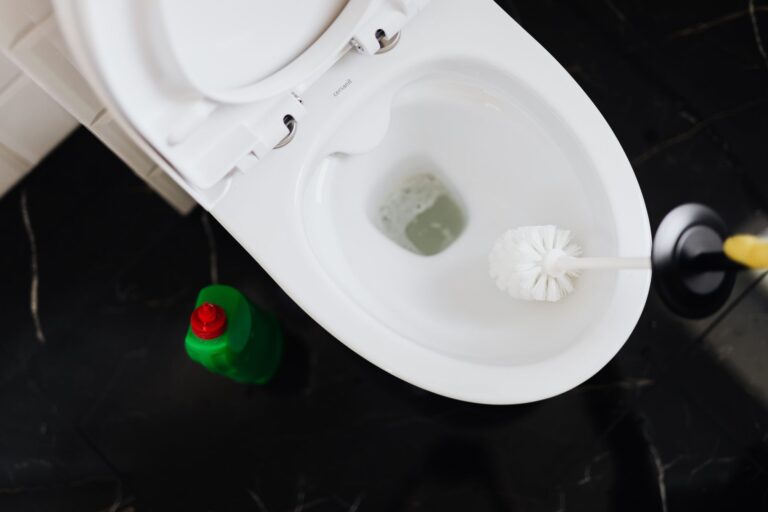

Using an angled brush, direct a suitable cleaner beneath the porcelain lip, leave it for the label-stated dwell time, then scrub away buildup. This method reaches the upside-down band a standard brush misses, loosens grime before force is needed, and keeps incompatible cleaners out of your bowl.
You can identify the stain, choose a compatible cleaner, clear blocked rim jets, and keep your bathroom routine focused on the spots that collect residue.
Stain Clues Point to the Right Cleaner
The color and texture beneath the porcelain lip tell you what has collected there. Soft gray specks point to splash residue and everyday soil, while a hard white or tan crust points to calcium and limescale buildup from hard water.
Black mold or mildew can appear as a dark, damp-looking film. Your concern rises where a stale odor returns, discoloration spreads beyond the bowl, or moisture appears around the tank, floor, wall, or supply line.
| What you see | What it suggests | Your next move |
|---|---|---|
| Soft gray film or specks | Splash residue and everyday soil | Use toilet bowl cleaner, then brush the underside. |
| Black slimy streaks | Biofilm, mildew, or moisture-fed growth | Lift the film, rinse, then use a disinfecting cleaner as labeled. |
| Brown or orange marks | Rust staining or mineral-rich water | Use white distilled vinegar, citric acid, or a bowl-safe acid descaler. |
| White or tan crust | Calcium scale and limescale | Soften deposits with an acidic cleaner before brushing. |
Texture Separates Scale From Surface Film
A chalky ridge that feels rough through a gloved fingertip needs time with an acidic product. A brown mark beneath the front rim may fade after two rounds of citric acid, while gray film can release during one focused brushing session.
That difference protects your porcelain from needless abrasion. To remove buildup under toilet rim surfaces, match the deposit to the cleaner before reaching for a pumice stone or stiff brush.
Cleaner Choice Depends on the Deposit
Direct contact matters more than pouring liquid into bowl water. Cleaner sitting below the waterline has little effect on a crust clinging upside down beneath the rim, so your placement method matters as much as the product.
| Cleaner type | Useful for | Use limits |
|---|---|---|
| Toilet bowl cleaner | Routine soil, splash residue, and light film | Follow bottle directions and flush after brushing. |
| White distilled vinegar | Light hard-water stains and mineral deposits | Never pair it with bleach or unknown cleaner residue. |
| Citric acid solution | Stubborn calcium crust and limescale | Use on a fully rinsed bowl with room ventilation. |
| Disinfecting cleaner | Surface sanitation after visible soil is lifted | Keep the surface wet for the full label contact time. |
Tools Reach the Underside More Directly
An angled rim brush reaches the channel where a round toilet brush falls short. Your backup tool can be an old toothbrush or narrow detailing brush reserved for bathroom work.
- Angled rim brush: Its bent neck reaches beneath the lip without forcing your hand into the bowl.
- Squeeze bottle: A narrow angled tip directs liquid exactly where residue is attached.
- Personal protective equipment: Nitrile gloves and eye protection limit contact with residue and splashes.
- Paper towels: Thick towels hold cleaner against a stubborn patch for a short dwell period.
- Bathroom light: Bright light helps you spot missed crust along the rear rim channel.
Use one cleaner at a time. Never mix bleach with vinegar, citric acid, ammonia, acidic toilet bowl cleaners, or residue from an unlabeled product.
Clorox and Lysol products carry different cleaning and sanitation directions, so the front label alone does not tell you how long a product should remain wet. Your bottle’s dwell-time instruction controls the result after visible black film has been brushed away.
Keeping the chosen product wet long enough lets it soften deposits before brushing begins.
Targeted Contact Loosens Under-Rim Deposits
The toilet rim cleaning hack is holding cleaner against the upside-down surface long enough for soil or mineral crust to loosen. Stronger scrubbing alone can scatter dirty water and leave the stuck material in place.
- Flush the bowl: Start with fresh water so loose debris leaves the bowl and the rim channel is easier to see.
- Aim cleaner upward: Send cleaner beneath the lip through its angled nozzle or a dedicated squeeze bottle.
- Wait for dwell time: Give the product its label-stated time instead of brushing it away after 10 seconds.
- Scrub with short strokes: Work from the rear of the bowl toward the front with controlled motions.
- Flush away residue: Lower the lid, flush, and inspect the porcelain under bright bathroom light.
Paper Towels Hold Cleaner Against Scale
One folded strip tucked beneath the rim keeps cleaner pressed against a stubborn patch. Dampen the towel with vinegar or citric acid only after earlier products have been fully rinsed away, press it against the crust, and remove every piece before flushing.
Keep this method limited to a visible, secure spot. Your goal is steady contact, not a wad of paper caught in the bowl passage.
Controlled Brushing Cuts Down on Splashes
Short strokes beat wild circles. Hold the brush head under the rim, pull outward toward the bowl center, and rinse the bristles in flush water between sections.
A black line at the back of the bowl needs several focused passes with an old toothbrush, not a full-bowl scrub. That motion helps you clean under toilet rim edges without flicking dirty water toward your face.
Black Film, Brown Stains, and Scale Need Different Methods
Visible dark film should come off before sanitation begins. Brush away the attached layer with a compatible cleaner, flush the bowl, then coat the porcelain with a disinfecting cleaner for its full label contact time.
Black Growth Needs Physical Cleaning First
Cleaning and sanitation perform different jobs. Soil blocks surface contact, so a sanitation step works poorly across slimy material that remains attached to porcelain.
To clean black mold under toilet rim areas, remove the film before applying a labeled disinfecting cleaner. Your next inspection should include the tank, supply line, wall, and floor because recurring moisture outside the bowl can point to a leak or poor ventilation.
Brown Stains Need Acid and Dwell Time
Brown rust stains and mineral marks soften under vinegar, citric acid, CLR, or another bowl-safe acid descaler used according to its directions. Leave the product in contact, brush gently, flush, and repeat rather than gouging at the mark.
Bar Keepers Friend has abrasive and acidic formulas, but the label controls whether a specific version belongs on your toilet surface. To remove brown stains under toilet rim areas, choose a product intended for porcelain and rinse the surface fully afterward.
Wet Pumice Has a Limited Role
A pumice stone suits stubborn mineral residue on compatible porcelain, not black biofilm or soft grime. Keep both the stone and bowl wet, use feather-light pressure in a tiny area, and stop at once where the glaze looks dull or scratched.
A Pumie or similar pumice tool can mark some finishes. Your safest move is a small wet spot check away from the visible front of the bowl.
Rim Jet Flow Reveals Mineral Blockage
Uneven water streams during a flush can reveal scale inside the tiny openings beneath the rim. Mineral deposits narrow toilet bowl rim jets, leaving crooked water paths, dry patches, or a weak swirl in the bowl.
Flush Patterns Show Restricted Openings
Stand clear, flush once, and watch water leave the rim channel. Your rim jets need attention where flow stops, sprays sideways, or leaves the same dry section after each flush.
- Weak streams: Reduced flow can signal mineral crust near several jet openings.
- Crooked spray: A sideways stream points to a partly blocked hole beneath the rim.
- Dry segment: One dry area suggests a blocked opening near that spot.
- Slow bowl wash: Poor rim flow leaves soil behind after a normal flush.
Gentle Clearing Preserves Jet Openings
Coat the rim channel with a scale-focused cleaner and allow its label-stated working time. Then use a small brush or wooden pick to clear visible openings without widening them.
Metal wire can chip glaze or alter the jet opening, changing how water enters the bowl. Repeated weak flushing after surface cleaning can point to deep internal scale, a tank setting issue, a worn flapper, or a plumbing fault that needs professional help.
Preventive cleaning reduces surface buildup, while persistent flow problems call for diagnosis rather than more scrubbing.
Weekly Care Limits Heavy Under-Rim Scrubbing
A weekly pass keeps fresh residue from turning into a cement-like ring. Spend about two minutes brushing beneath the lip after routine bowl cleaning, then target new mineral marks before they harden.
Small Habits Keep Deposits Manageable
- Brush the underside: Reach beneath the porcelain lip each week, not only around the bowl wall.
- Rinse product residue: Flush after each product cycle before changing cleaner types.
- Spot-clean new scale: Use vinegar or citric acid on hard-water marks before a crust forms.
- Watch flush flow: Check rim jets every few months in homes with hard water.
- Air the room: Run the exhaust fan or open a window during strong cleaner use.
Routine Errors Leave Deposits Behind
Pouring cleaner only into bowl water misses the target. Skipping dwell time, using a brush that never reaches upward, and layering products over residue leave cleaning work unfinished.
Repeat the stain-specific method for mineral marks that remain, then rinse fully before changing products. Call a plumber where poor flushing, leaks, or weak water flow continues beyond visible rim-jet buildup.
Final Thoughts
Targeted contact works better than harsher chemistry. Match the stain to the cleaner, give that product its label-stated time beneath the porcelain lip, and use a narrow brush with controlled strokes.
Your toilet stays easier to maintain because fresh deposits come off before they block rim jets or harden into scale. Clean under toilet rim surfaces as part of your weekly bathroom routine, especially where hard water leaves white crust around the bowl.
FAQ
How do you clean buildup under the rim of a toilet?
Flush the toilet, direct a suitable cleaner beneath the rim through an angled nozzle, and leave it for the stated dwell time. Your angled rim brush or old toothbrush can then lift loosened grime, scale, and residue before you flush the bowl clean.
How do you get rid of black stuff under a toilet rim?
Brush away the black film with a compatible bowl cleaner before using a sanitizing product. Your chosen sanitation product needs to stay wet for its full label contact time, since visible film can block it from reaching the porcelain surface underneath.
What can I use to clean under the rim of a toilet?
An angled rim brush, narrow detailing brush, or old toothbrush reaches the underside better than a standard toilet brush. Your cleaner choice depends on the deposit: bowl cleaner for soil, vinegar or citric acid for scale, and a labeled sanitizing product after cleaning.
How do you remove brown stains from under a toilet rim?
Brown marks respond well to an acid-based descaler because rust and mineral deposits cling tightly to porcelain. Your safest method is to give vinegar, citric acid, or a bowl-safe descaler time to work, brush gently, flush, and repeat as needed.
Can vinegar dissolve hard-water buildup under the toilet rim?
White distilled vinegar can loosen light to moderate limescale because its acidity breaks down mineral deposits. Use it only after bleach or other products have been rinsed away, keep the room ventilated, and brush after the contact period.
What is the easiest hack for getting cleaner under a toilet rim?
A dedicated angled squeeze bottle directs cleaner beneath the porcelain lip more precisely than pouring it into bowl water. Your cleaner stays against the upside-down surface, where it can soften scale before you scrub with an angled brush.